
JGL would like to dedicate this to the late Anthony Bourdain, his friends and family. Like so many in our industry, he struggled, but like so many in our industry, he spent the time that he had inspiring us to look beyond our own backyards, to experience other cultures and reach new levels of understanding of what it means to be human. Thank you, Mr. Bourdain, for reminding us that food is a universal language that pierces rhetoric and reveals the soul. You are already missed. RIP Anthony Bourdain (1956-2018)
“If I put up an Instagram photo of, just hypothetically, me and the Dalai Lama and Keith Richards in a hot tub… I’ll get 5,000 likes in an hour. If I put up, and I have done this, I put up just a picture of an In-N-Out burger sitting on a table in isolation in an anonymous room, I’ll get 50,000 passionate likes and comments in like 10 minutes. It’s incredible, because people relate to certain foods and feel strongly about them.” Anthony Bourdain
We live in a new day and age where social media dominates our social and political structure. According to PEW Research center, by 2017, 81% of American’s now have a social media profile. According to estimates the number of worldwide social media users reached 1.96 billion and is expected to grow to over 2.5 billion in 2018. Surprisingly, many of those new social media consumers were not millennial’s. PEW found that 55% of American’s 50 or older regularly consumed their daily news from social media.
Which begs the question, if social media is the key to how we as a people decide to consume our information, then perhaps it is logical to ascertain that this is also the inevitable doorway in which customers will choose their next restaurant experience. Yet, according to Gerard Murphy, director of product at TripAdvisor Restaurants, nearly half of U.S. restaurateurs reported spending less than 10% of their time on marketing activities. Meanwhile, 94% of restaurateurs reported monitoring their business reputations online “several times a week.” 13% of those restaurants reported paying for a professional reputation monitoring service. When speaking to restaurateurs it was evident that most establishments were more focused on defending their reputations than actively promoting it. Perhaps a shift in strategy is needed. It’s time restaurateurs embraced social media and directed their own online presence and narrative. After all, within that same study TripAdvisor discovered that establishment’s which had “extensive decision-driven content” online along with one single photo experienced up to 44% more interest and interaction with future diners.
So, how does one begin to take control of their establishment’s online presence? The answer is simple, let the food speak for itself.
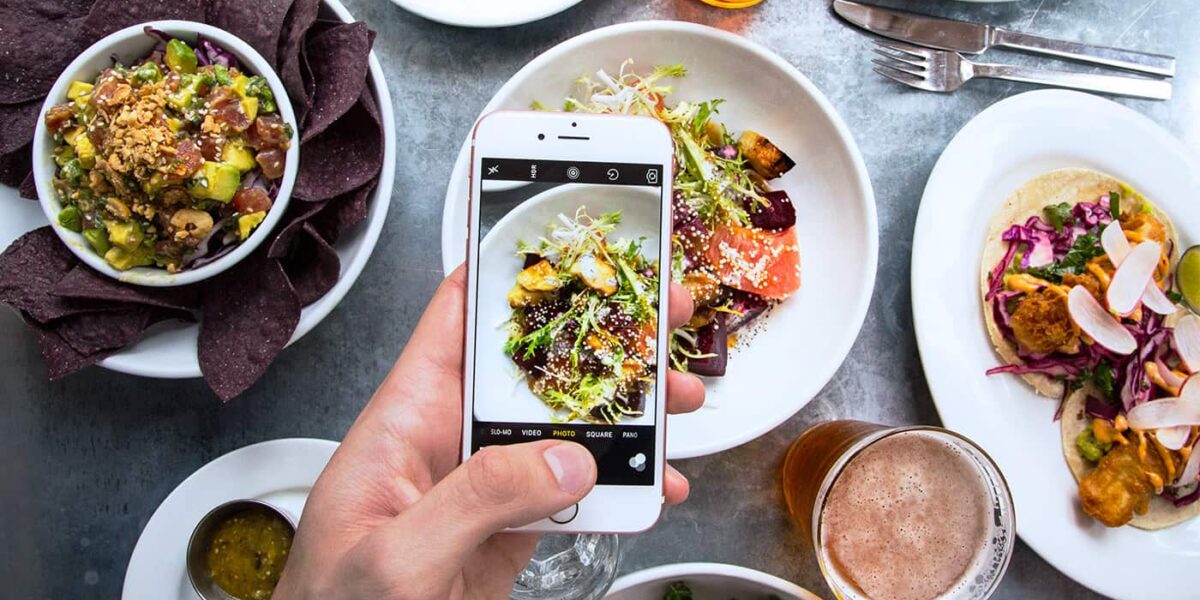
In this blog, you will learn some quick tips and professional tricks of the trade that will give you “Instagram worthy” food photography that will motivate customers to visit your establishment. The best part is, you can achieve high end, artistic results with the simple use of an everyday smartphone.
Step One: Create a story. Channel your inner Spielberg by asking yourself:
– How do I want my customers to feel: cultured, sophisticated, cozy, neighborly, the rush of excitement from a foodie adventure?
– When people experience my restaurant or venue what basic human needs will be met?
– Who are my regular customers? Why do they keep coming back?
– What demographic of new customers do we wish to attract?
Asking yourself these valuable questions will guide you on what your photographic objective will be. It’s important to note that future and recurring customers on social media are motivated by their brains response to vibrant and exciting stimuli that entice new and exciting experiences. Human beings love to feel connected to imagery that supports their optimal lifestyle. Your job is to appeal to their basic human desire to connect and convey a lasting cultural association on a deeply personal level to your food. Your images should inspire, motivate, and encourage them to visit again and again. No pressure.
Now how can you do all that? How do you make a simple picture of food an invitation? It’s easy! Cook great food and just add people. No, not to the food. Add a human element to your images. For a more communal feel lend a hand, literally. A simple image of a chef’s hand holding up a dish conveys a casual and personable tone to your establishment. For a more sophisticated clientele, show a personable hand cutting into a perfectly executed pink, medium-rare steak. Cut into a slice of pie with a fork. Take a scoop of cobbler. Hold up that ice cream cone. Hand drizzle honey or maple syrup onto the plate. Leave the fork on the plate inviting your customers to dig in. Your job is to remind your customers of how good life can be if they just show up.
- Step Two: The Right Surface
Where and what you place your food on in a photograph is as important as the food itself. The right surface and background can set the tone and create added character to your food photography. Simple white bone china will not only act as a natural reflector and bounce the light back up onto your food, it won’t visually compete with it. Dark foods often pair well with dark backgrounds. Lighter foods often pair well with lighter backgrounds. However, rules are made to be broken.
Surfaces Pro Photographers Use: wood grain tables, chopping boards, textured tiles wrinkled up grocery bags, natural parchment paper, textured linens, and believe it or not, old distressed sheet pans. Old distressed sheet pans, with the right staging, may look hideous in person but photograph beautifully. They can add depth and rustic character to a pie or a casserole dish.
- Step Three: Experiment
Play with your food. Does your food look a little bland? Fish, pasta, chicken, and bread can taste remarkably delicious but often photograph as a little too beige, boring, and uninspired. To fix this create a visual recipe by adding dry ingredients around your place setting. Spice, chocolate chunks, berries, nuts, and fresh herbs can add a sense of creative whimsy to your images. Vibrant colors placed upon on bright plates, glassware, flowers or cooking utensils can also add a sense of immediacy and add a little kick to your design.
- Step Four: Use Fresh from the Oven Food
Ok. Now that you’ve got a visual concept of what you would like to convey to your audience it’s now time to focus on the execution. The greatest advice one can ever receive about food photography is to take your time and shoot with fresh food. When prepping for an iphone photo shoot ask your chef to stretch. Do not let your staff serve all your dishes at once. If all the dishes are served at once the food will stagnate. The naked eye may not pick it up, but the camera will. Your goal is to photograph food at its optimal level. Your staff may gripe but spacing out each dish to photograph will be worth the wait. That is unless your concept is to have a visual feast upon a table. Then scratch what I just told you and tell your chef to bring it. “Game on.”
- Step Five: Natural Light
Did you know that most of the food photography you see on the cover of your favorite gourmet cook books and the ever-so effortlessly perfect “Martha Stewart Living” magazine is shot purely in natural sunlight? No expensive lighting or fancy studio needed. In fact, the most state-of-the-art photography studio lighting equipment is carefully manufactured and built to synthesize the exact look and appearance of pure natural sunlight. Natural light gives a fresh and airy quality to portraits. However, artificial light, which appears normal to the naked eye, will often cast a subtle orange or yellow cast onto your image and underscore detail. That is why that late-night, indoor picture of your favorite dish never turns out quite right. So, instead of dishing out $50-$100 for a mini-studio box on ebay or amazon.com, find a table near a window that will give you better results and keep that precious money in your pocket.
Sunlight is best when it is an indirect and diffused light. Which means overcast days or a table near a window are your new best friends. Too much direct sunlight will drown out detail and create harsh shadows. Yet, many people don’t know that shadows are just as important as light in portraits. A hint of shadow will give your image depth, drama and contrast. If the lighting near your window table is still too harsh, sheer curtains or a roll of wax paper from the kitchen cleverly tapped to the window are a perfect way to diffuse that bright mid-day sunlight.
*Tip: a photographer’s favorite time of day to shoot is during “golden hour” which is an hour before sunset. That’s when the sky gives off a soft and dreamy light. You can photograph great images at any time of day, but this is the hour when the world becomes magical.
*Tip #2: Don’t be a shadow! When photographing your subject, avoid placing yourself directly between your light source and your muse. Remember: with the light on your back, food looks flat. Light that is directed from one side, and/or behind your subject will create the perfect balance of light and shadow to create added drama and texture.
- Step Six: Reflectors
Use a reflector. A reflector is a reflective surface that will simply bounce more multi-directional light back onto your subject. You can purchase a professional reflector kit online, or you can get the exact same result with a sheet of white paper, aluminum foil, or better yet, white foam-core poster board from your neighborhood Target. The only reason why photographers spend dubious amounts of money on shiny, white, circular reflector kits is because is simply looks more professional to the client.
Once you have your reflector, look where the direction of the light is heading. You want to “catch” that light and bounce it back onto your subject. The usual placement for a bounce is directly opposite of your light source or placed between the subject and your camera. Photographers will also experiment with multiple reflectors to the side, in front of, and behind the subject.
*Tip: If you have an artificial light source compromising your image, either turn-off the all the lights or block the artificial light with a strategically placed black napkin, curtain, table-cloth, or poster-board. Get creative and either prop-up or ask a co-worker to hold them up to block that artificial light source.
- Step Seven: Know Your Angles
Here are some classic go-to camera angles to try out.
-Birds Eye View
This angle is shot from above and looking down at your plate. It’s often best with pizza, sauces, soups, macaroni, etc. This angle is often created by standing on a tall chair or simply staging your plate on the ground. *Do not let the customers or health department see you place a plate on the ground. It doesn’t matter if no one eats it later. It just won’t go well.
-Straight On
This shot is “head on” to one side. Best with Burgers, bread, cake, muffins, etc.
-The Hero Shot
This angle is slightly lower than “straight on.” Lower the camera slightly and angle your camera looking straight up at your food. This gives an everyday burger a very heroic look.
-Diagonally 45 Degree Angle
This is a top and side view on 45 degree angle. This is best with three dimensional food shapes and is the angle most often used.
-15 Degrees
This is best for cocktails and other tasty adult beverages. It’s an angle that is slightly higher than straight on. You see a little bit of the top and back of the glass.
Now you’re ready to hit Instagram with creative and exciting imagery. It’s that easy.
This blog was written by Michelle Faraone McCallum, Independent Food Photographer. Thank you Michelle, for your contribution to ‘Food for Thought!’